
Top 5 Lightroom Editing Tips for Beginners
So… you’ve decided to start your photography journey! Congratulations! This is a great place to start.It can seem like a daunting program when you’re starting out, but I’ll show you the ropes!
Using your Basic Exposure Corrections
This is the first step to making any image spectacular! In this tab you’ll be able to correct your basic exposures. Lightroom is the perfect app to do this.
Exposure adjusts all aspects of your image (the shadows, midtones and highlights)
Highlights will affect the brighter parts of the image
Shadows will affect the darker parts of the image.
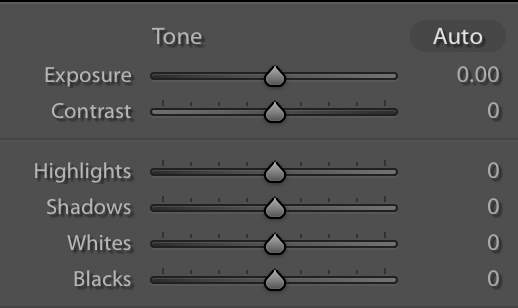


(optional) If you want to make the true whites and true blacks lighter or darker, you can toggle with these, but I generally wouldn’t recommend to a beginner until you can master those top few which will be most important to you!
Using these will help balance your images exposure, which is the foundational starting point before doing any of the fancy colour grade! Always do this step first and foremost!
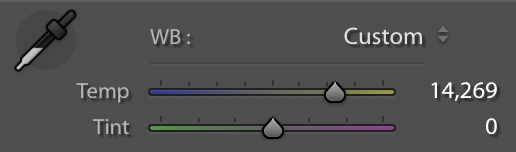
2. Adjusting your White Balance

Cool White Balance


Warm White Balance

Correct White Balance

This is crucial to creating a well balanced image. Sometimes the cameras Auto White Balance doesn’t always get it right.
From the left (cooler) to the right (warmer) can help you find the ‘correct’ white balance by toggling until you get “true white”
This can get really fun later on once you master this! You can create all different moods for your photos using different and ‘unconventional’ colour casts once you get a good understanding of colour theory.
Lightroom has a number of amazing features! For now I would suggest learning a simple and natural edit, which will help you in the long run.
3. Using Tone Curves for Contrast

Without Tone Curve

With Tone Curve
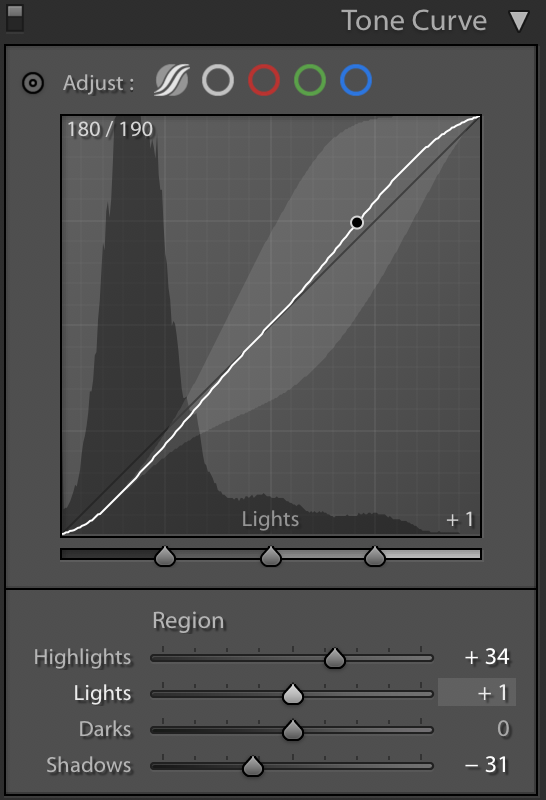
This is much better than the contrast slider, and I’ll tell you why!
You can pinpoint exact points in the shadows (bottom left) or highlights (top right) on the diagonal line, and move them independently. The bottom left represents the darkest points of the image, and the top right represents the lightest points in the image. If you select anywhere along this line, it will slightly adjust different tones of the image (the middle being mid-tones).
The contrast slider in the basic exposure corrections moves both only the shadows and highlights simultaneously, which takes away from the control of moving both independently, and this way can possibly make for some areas to be too dark, and others blown out.
This Lightroom feature allows you to select multiple points along the diagonal line, and adjust independently so you can be more specific in the areas you want brighter and darker. This is a great editing tip for beginners to fine-tune your images.
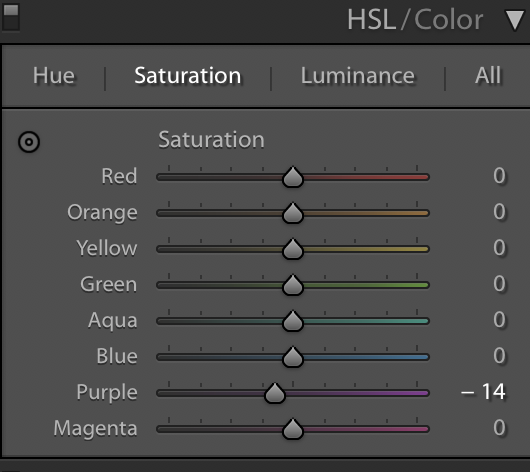
4. Instead of Upping the Saturation (rookie beginner mistake), use HSL Slider Tab
Lightroom’s HSL Slider tab allows for;
A) Changing the hue of the colour independently
This means changing it to a slightly different shade of that colour. Handy if you want the red colour to appear more pink, or on the other end of the spectrum, more orange for example.
B) Changing the saturation of the colour independently
You can shift to increase or decrease saturation, this can give you more pastel colours of you desaturate, or more vibrant colours when increasing the saturation.
C) Changing the luminance (or brightness) of the colour independently

Hue


Hue and Saturation

Hue, Saturation, Luminance

In this example, I shifted the colours of the purple leaf petals to be a different hue, saturation and luminance so you can see the difference.
This shifts the brightness of the selected colour, say you want someone’s red lipstick to be brighter, you can change the luminance and make only that colour brighter. Cool hey!
This simple editing tip can greatly impact your images. This allows you to be a little bit creative in your colour choices. The more you play around with these, you’ll see what works well and what doesn’t.
You can change the colours red, orange, yellow, green, aqua, blue, purple and magenta independently which allows for more refined colour choice and edits.
5. Cropping
This one seems fairly simple, but a vital part of creating any beautiful image (when needed 😜)
Sometimes, we don’t always get the perfect framing when capturing our favourite scene, bummer hey, it happens to the best of us.
In Lightroom, click on the little dotted square icon, this will allow you to crop, and rotate the image.
I have had the trouble before where my horizon line hasn’t been fully straight, or even where my Rule of Thirds didn’t quite line up like I thought. These little things can really impact the quality of your image. Using the crop/rotate tool for these scenarios is a life-saver! See the difference in these photos! It is quite drastic, but definitely improves the aesthetic and quality of the image!

Without Crop

With Crop
These are just a few tips to get you started!
As you advance in your photography journey, I encourage you to experiment more with the other tools Lightroom has to offer! My other favourites is the brush tool and the spot healing. Hey now! Don’t jump to that yet! Take your time learning the above and you’ll be a pro in no time!
If you click here you can download Lightroom to start your photography journey! This is by far the best app I have used and allowed me to create really amazing, high quality, and professional photos all while being an easy tool to use.
Comment below and let me know what you think of these tips and if you found them helpful!