How to Edit Dark Moody Photos in Lightroom
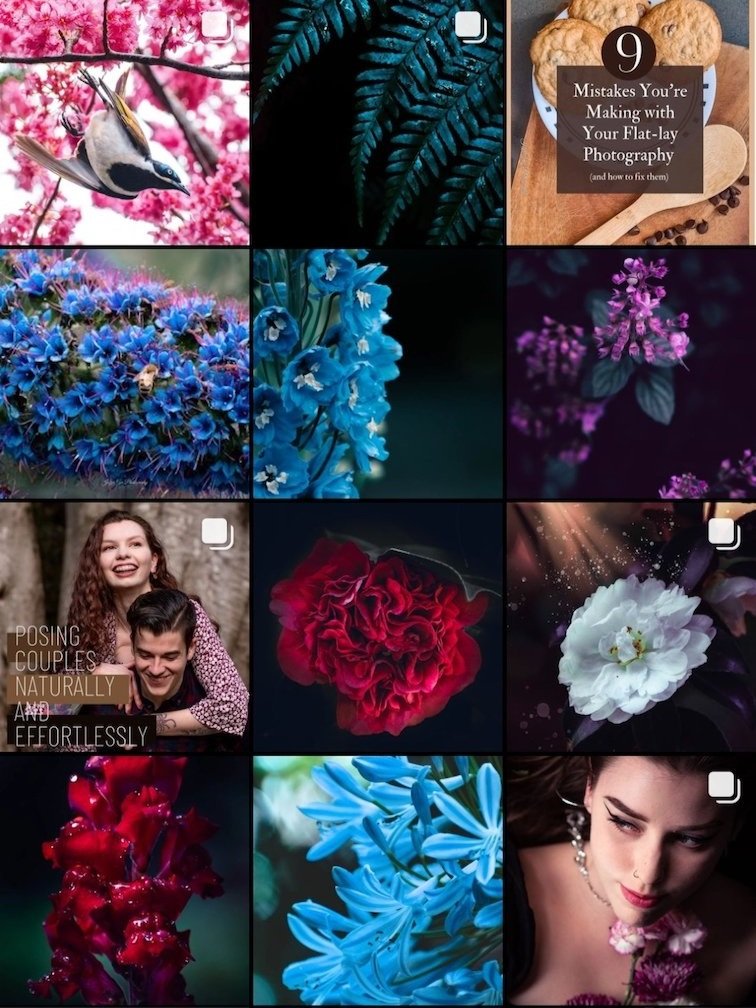
Dark and moody photos have been popular for a while now, especially on Instagram - but just how do you create a photo with this effect? I have been creating dark and moody photos on my Instagram for quite some time now and it is a really simple process to achieve! Here is my step-by-step guide in how to create dark and moody photos in Lightroom.
1. Up the Contrast using the Curves Tool
Using contrast in your pictures creates deeper blacks and lighter highlights!
I always use the curves tool over the contrast tool in your basic adjustment settings - the curves tool gives you pin-pointed ranges you can change (e.g. you could create lighter highlights and brighter shadows shadows, or vice versa). You have more control of the image using the curves tool.
Any dark and moody photo has lots of contrast in it, bright highlights and dark shadows. In order to create that effect - the curves tool is best. Creating a subtle S shape as you can see by the picture on the left will create that contrast you need.
Depending on your image, you may need to have a more intense S curve if its a bit brighter.
Use the S shape as a guide with your own image!
2. Change the Temperature
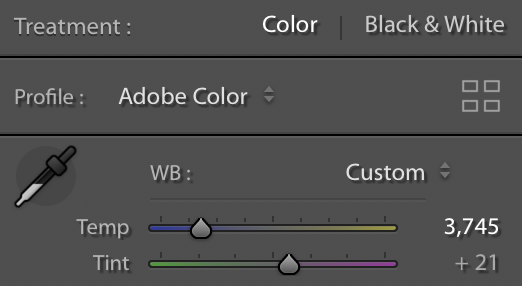
Often times, dark and moody photos have a cooler temperature to add to the dramatic appearance of the image. As you can see, my colour temperature was set to 3’745, it made the greens of the leaves more blue rather than green. This is the effect we want to create that darker vibe, you want a cooler tone in all of your dark and moody pictures.
However, changing the colour temperature changes the temperature of the image as a whole, therefore the yellows in this image also become a colder colour, which isn’t what you want for the dark and moody look, we’ll discuss how to fix this in step 4 & 5.
3. Up the Highlights and Bring Down the Shadows
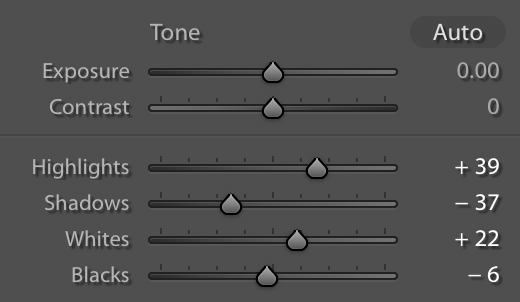
More contrast! Yes contrast is important for dark and moody photos! Using the shadows, highlights, whites, and blacks will effect how much your image is contrasted. This goes a step further than using the curves tool and tweaks things just that little bit more (every step counts!).
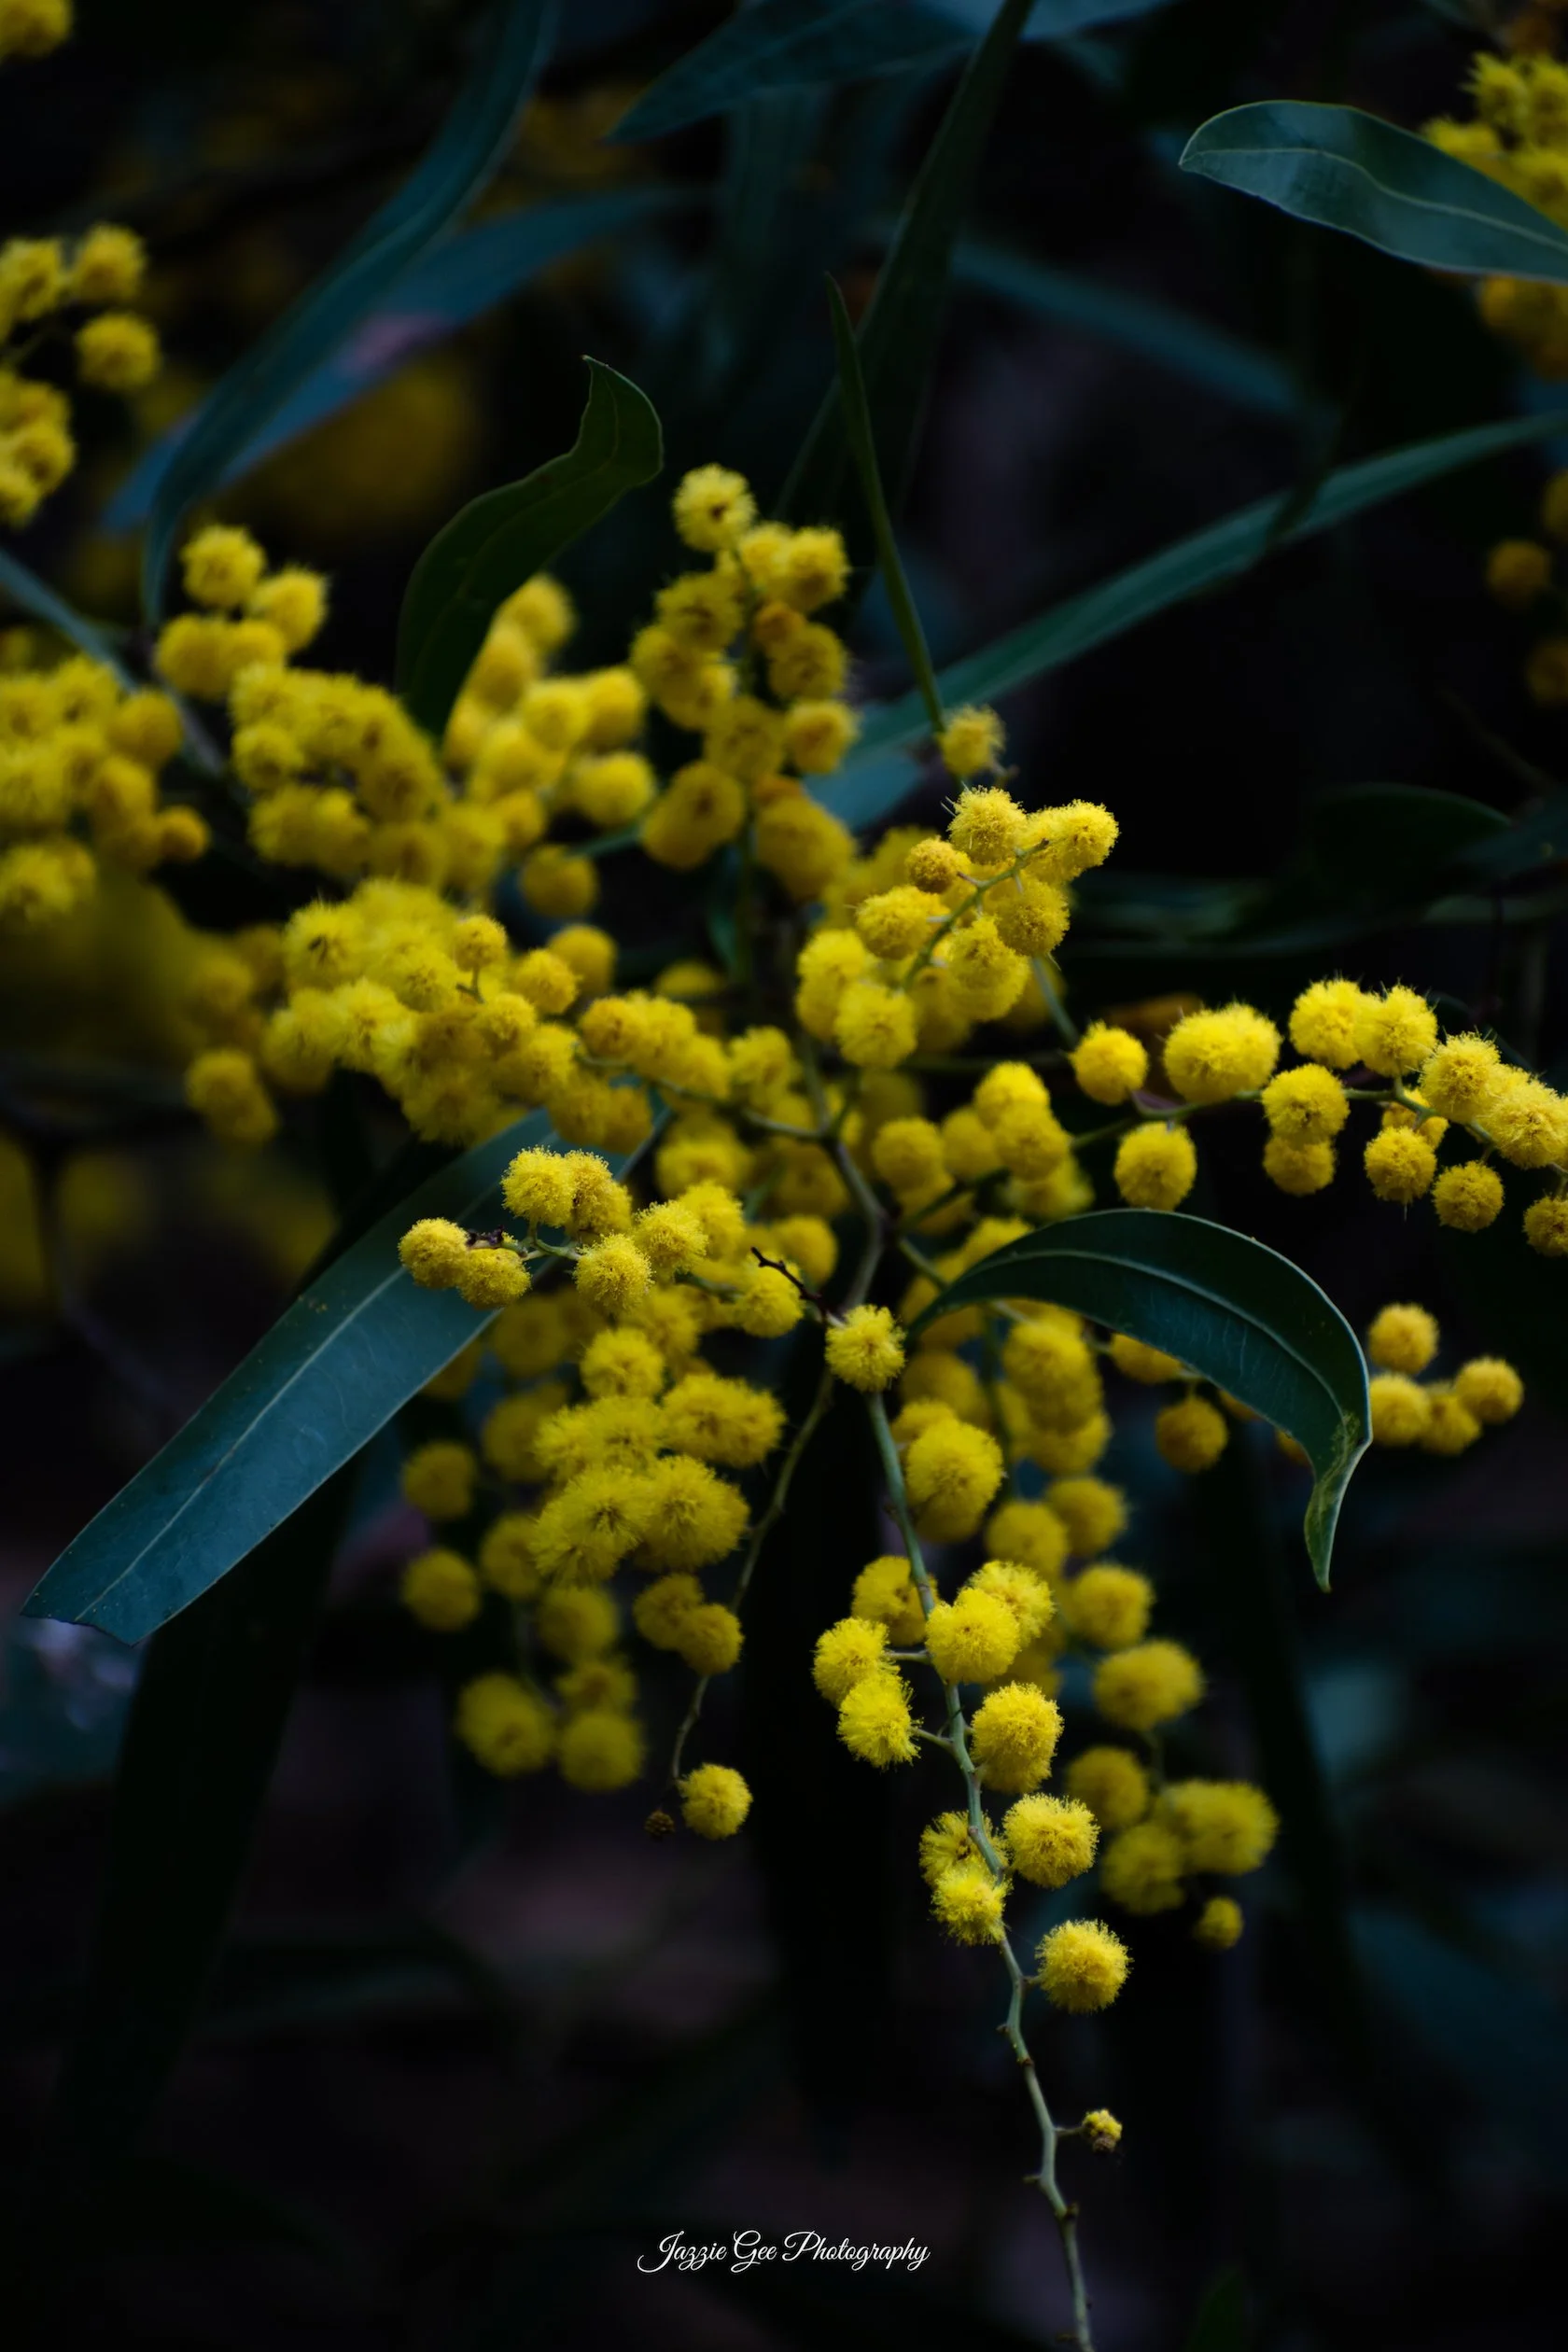
As you can see, it takes the image just that step further and created darker shadows, and lighter highlights on the flowers (which is what we want for our main subject to stand out!).
The effect is subtle, but in the grand scheme of things, it makes all the difference. Take a look at my settings I used for this look!
4. Desaturate the Image
Trust the Process!
Desaturating the image is going to get rid of any unwanted colours, and we can bring back the important ones later! I desaturated the image to get rid of the brown tones in the background and to make the leaves a little more desaturated and less intense in colour.
This is all for the main goal of creating a dark and moody photo with a main subject that stands out! The next step is to bring back my main subjects colours - the yellows!
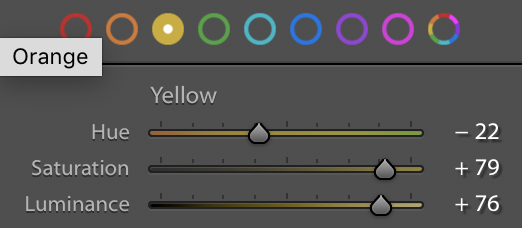
5. Bring back the Prominent Colours Using the HSL Sliding Tab
Here I solely brought back the main colour of my image using the HSL slider tab in Lightroom. I used the saturation and the luminance of the yellows to increase the saturation of them again and make them a bit brighter.
I also changed the hue of the yellow slightly to be a bit warmer, I thought this would slightly contrast with a cooler background to make a dark and moody photo.
After all of that though, I ended up losing that gorgeous blue tone I had with the leaves - and thats where split toning comes in.
6. Split Toning
Split toning is an amazing tool that can sometimes be overlooked in Lightroom, but it is perfect for creating dark and moody photos! Split toning adds different colours into your highlights and shadows of your image. Using complimentary colours for your split toning creates the moody photos you’re after (take a look at the colour wheel). I used complimentary colours; orange for my highlights and blue for my shadows.
Introducing blue hues into my shadows made my leaves have that colder look I was after, while introducing warm tones into my highlights made my flowers warmer and brighter.
The change is subtle but makes all the difference!
7. Add a Vignette
I find adding a simple vignette helps eliminate any distractions and helps draw focus onto my main subject. I think it helps my flowers stand out a bit more. This step is optional but it can help your photo look more dark and moody!
8. Additional Brush Touches
This is completely an extra, but I like to go through with the brush tool in Lightroom and go over my flowers to brighten them up just a touch, just to add to that dark and moody contrast we are going for.
Open up your brush tool and make sure the brush is feathered so you get a nice seem-less transition. Gently just go over the main areas of your image and make subtle adjustments to your highlights, exposure (and maybe saturation). You can see in the third image which specific areas I altered in red.
My settings were on the subtle side, slightly raising the highlights of the specific area I adjusted and bringing down some pure whites as to not overexpose. I feel this is the cherry on top by doing these small extras and I think it improves the overall quality of my photo.
9. Results
The before and after really shows the stark contrast and difference!
Once you put all the ingredients together you can truly create magic! The key to any dark and moody photo is creating contrast in the image and making your prominent subject/colours stand out, and everything surrounding to compliment that!
This is only one of many ways to create dark and moody photos in Lightroom - but this is my favourite and most used method!
Did you like this blog? You may like my blog that goes more in depth on how to edit dark and moody portraits!
Do you want more info on how to edit in Lightroom? Check out ExpertPhotographys free guide! Or if you want a more all-inclusive approach, I recommend checking out their photo editing course!
Was this helpful? Leave me a comment below on what you’d like to see next!

